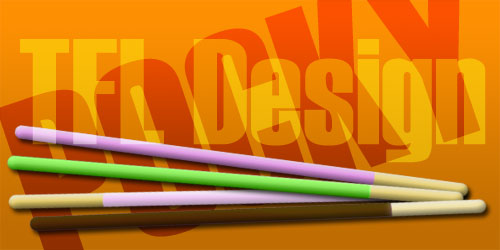
Welcome to this yummy tutorial! Using a few BLENDING OPTIONS, you can create these realistic Pocky™ Sticks in just a few moments! Follow the instructions carefully, using both the written text and visual screenshots!
I will be using a black background to better show the steps. You can simply create a new file with a transparent background to begin this.
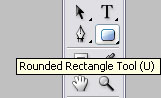
Using the ROUNDED RECTANGLE TOOL and the hex color #E3CA68, create a stick of your desired length.
Create a New Layer.
While still on your new layer, HOLD the CTRL button and use your mouse to click the Shape Layer.
Now choose the color/flavor of your choice and brush over the coated portion of the Pocky™ Stick. I chose Pink because my favorite flavor is strawberry. ^^ By selecting a layer while holding CTRL you are assuring the only parts painted are within the perimeters of the chosen layer- in this case, the Stick Shape. You are actually coloring a totally different layer however, not damaging the biscuit/tan portion. ^^
Now LINK the layers by clicking the square next to the eye thing on your Layer Window (A paper-clip icon will appear) and Merge the Linked Layers.
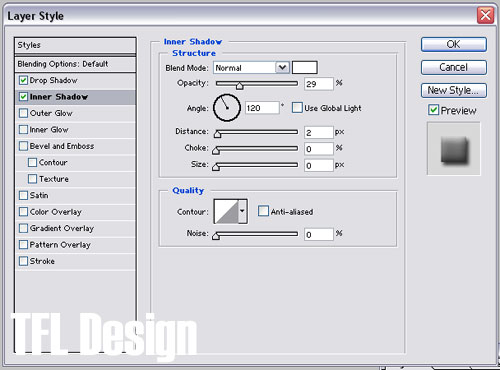
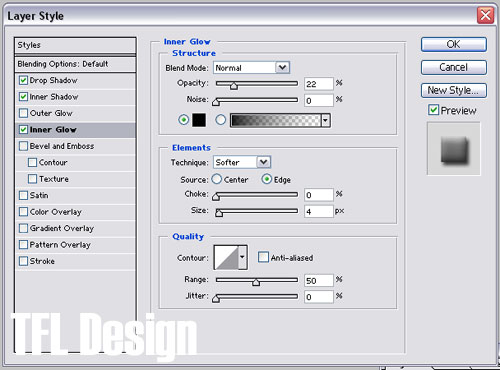
You can now DESELECT the layers by going to LAYER>>DESELECT on the menu bar. Your stick and flavor layer are now merged together. Now to do the blending/rendering.
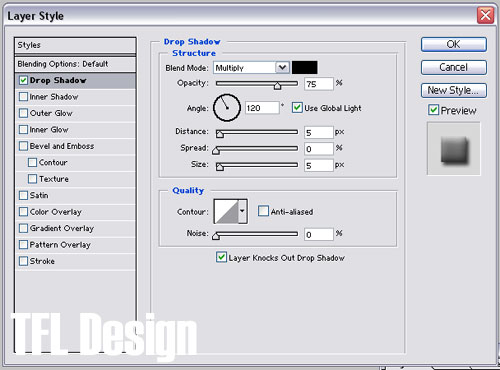
The Inner Shadow Color is #FFFFFF
The Inner Glow Color is #000000
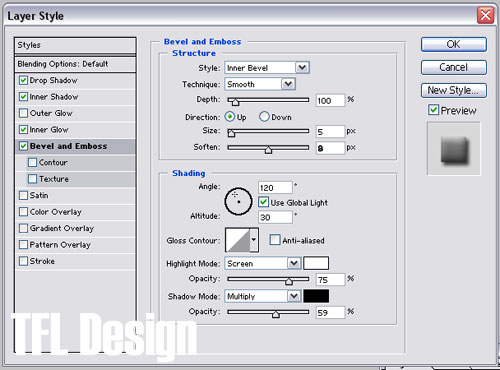
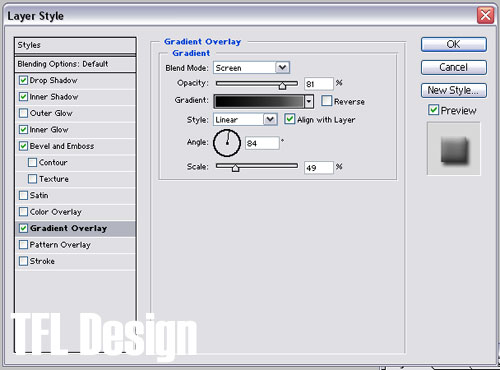
The Gradient is #000000 and #7E7E7E. Click on the gradient bar to adjust colors.
AND YOU’RE DONE!