Before reading this tutorial, please review my Glow Effect tutorial. This highlighting tutorial builds upon the glowing one. From this tutorial you will learn how to make something shine brighter even further and using the same technique, re-color/highlight something.
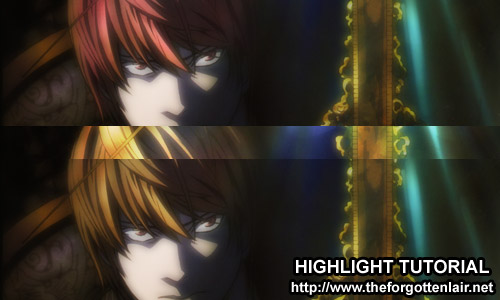
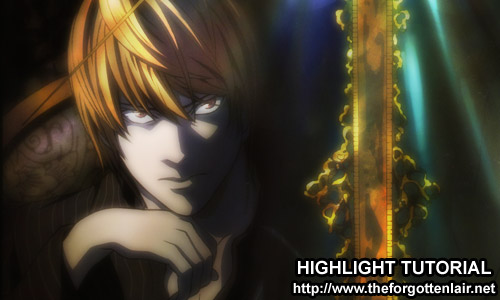
First we have our original image – one that has already gone through the duplicate/blur technique as seen in the Glow Effect tutorial.
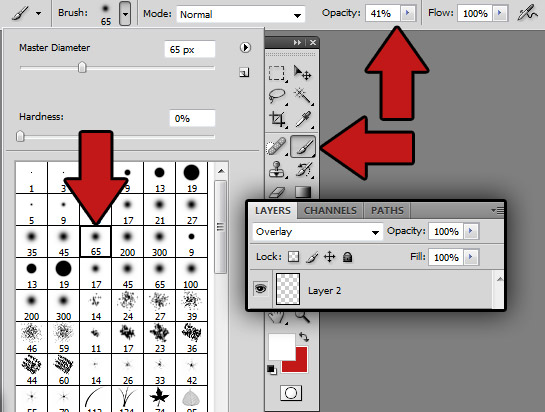
Now to make it glow further on certain key areas, create a NEW LAYER on top of this and set the blending mode to OVERLAY. Then use the ROUND SOFT BRUSH (any size you deem appropriate for the job) set at 40-60 opacity and brush in the areas you want to have highlighted. Setting the opacity lower than 100 allows you to control the amount better. (Especially if you work with a tablet that considers pen pressure.)
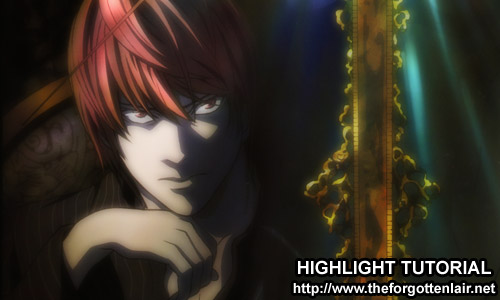
The end result is below.
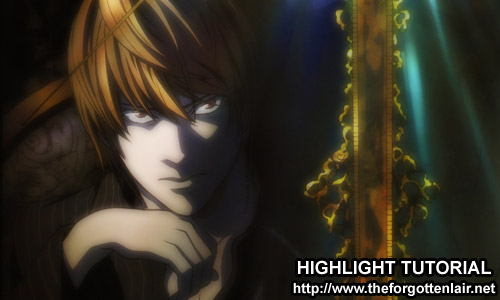
See the difference? This can help if you need to bring out a certain facial feature, glittery eyes, etc. Now using the same concept, we can color/highlight someone’s hair. To do this instead of setting the new layer to OVERLAY, we set it to HUE or COLOR. I like setting it to HUE better since that blending mode allows some of the original color to show. And of course, we brush with the color we wish to highlight in – in this case, RED. Below is the example.
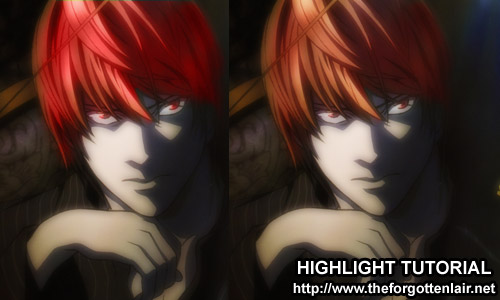
Now if you set it to COLOR, the color you use tends to be a tad strong for my taste. This is where setting the opacity of the layer itself comes in. Below is the example of opacity 100% vs opacity 46% in the COLOR blending mode.
So now that you know the concept of this, feel free to explore all the other blend modes to see what they do! My most popular ones are SOFT LIGHT, OVERLAY, HUE, COLOR, and COLOR DODGE.